This article describes the very basic steps to customize Shotgun Toolkit. For all features that go beyond this article I recommend you check out the official documentation.
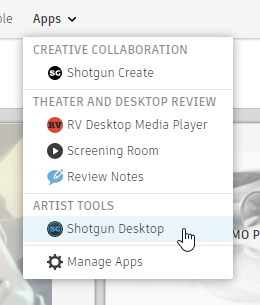
- If you download and install the Shotgun Desktop app from the Shotgun web interface, you’ll find that you can only access the basic setup with a limited feature set.

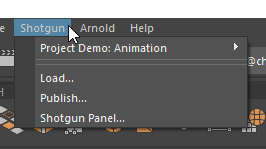
- As you can see in the following screenshot from Maya, this basic setup includes the Shotgun Panel, the Publisher and the Loader.
- In order to have access to the local file system, you’ll need to customize the default configuration. However, this sounds harder than it actually is.
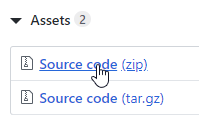
- You’ll find the default config for the Shotgun Toolkit on GitHub: https://github.com/shotgunsoftware/tk-config-default2/releases From here download the ZIP-package for the latest version.
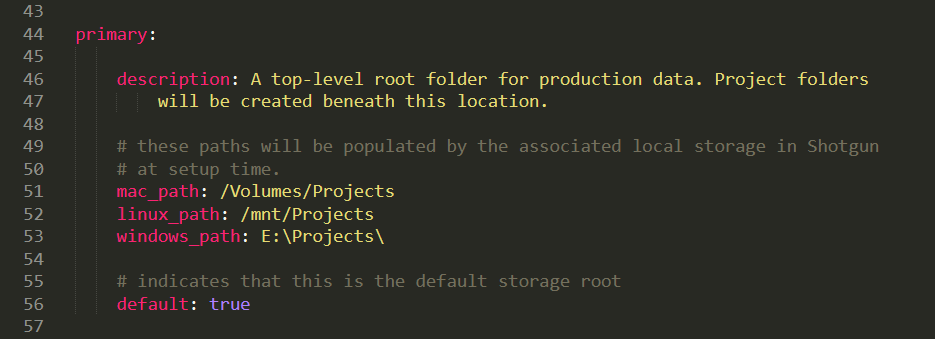
- Open the ZIP-package and adjust the file
tk-config-default2\core\roots.ymlso it points to the right project location. - In the Shotgun web interface you create a new item for the so called Pipeline Configuration. I personally prefer to create a new global page which lists all of my pipeline configurations.
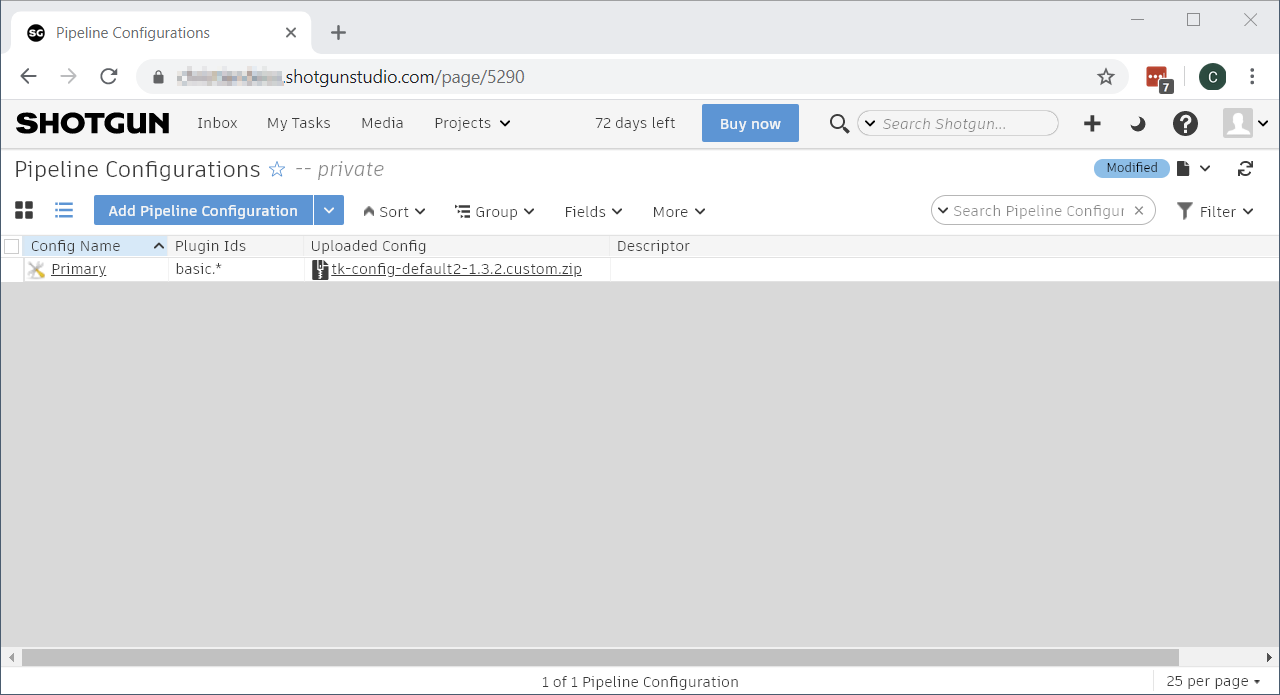
- The following settings are important:
- Config Name:
Primary - Plugin Ids:
basic.* - Uploaded Config: In this field you upload the ZIP-package for the default config that you downloaded from GitHub before.
- Config Name:
- Below you see an exemplary entry for a custom pipeline configuration.
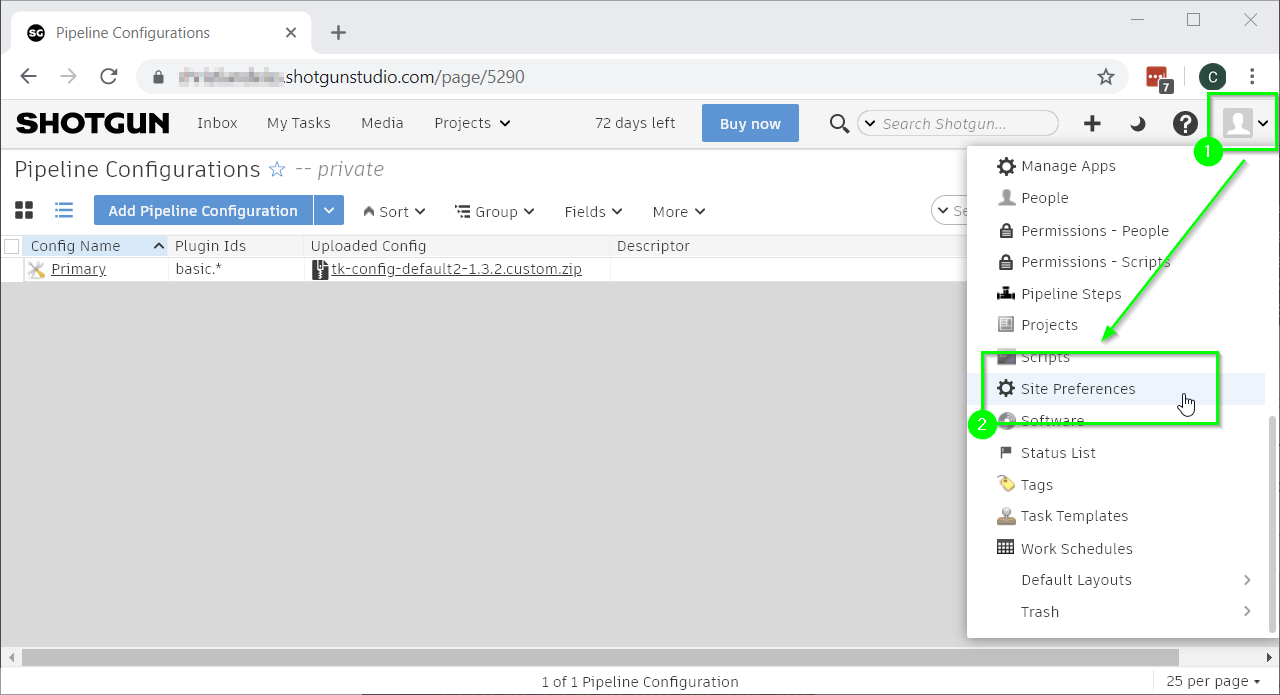
- In the next step you need to tell the Shotgun Toolkit where to find the project files. This is done in
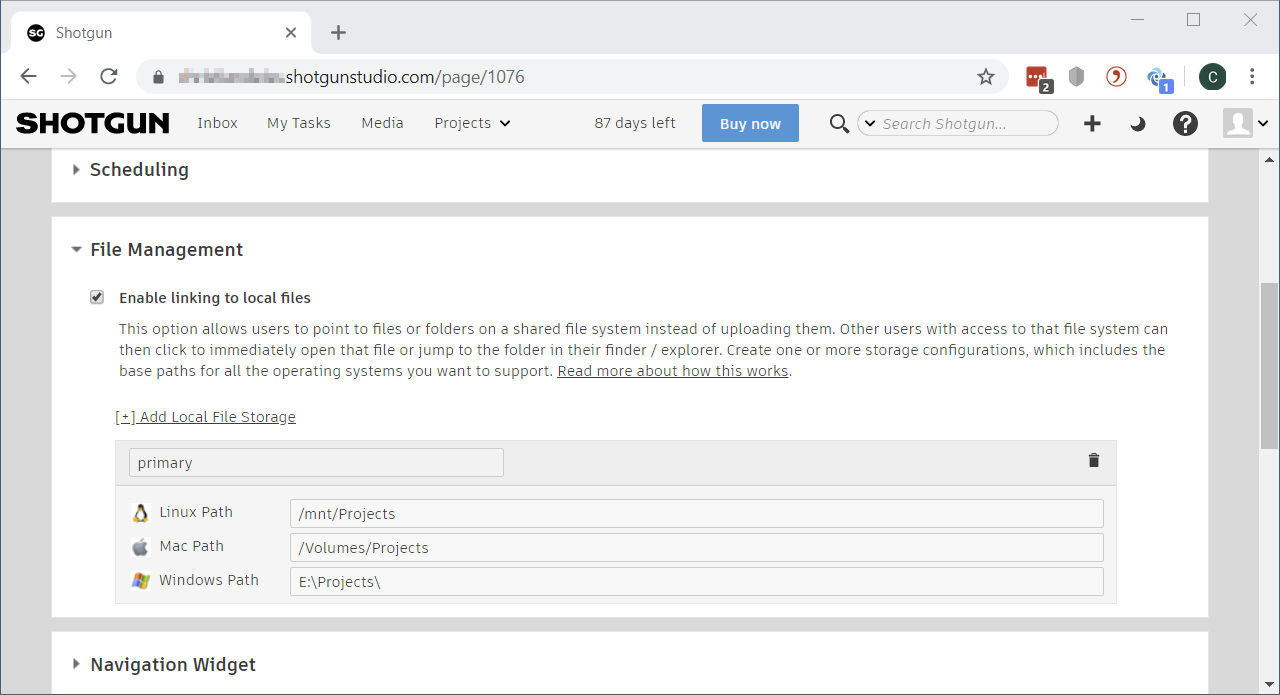
Site Preferenceswhich you access through theAdminmenu. - The “Site Preferences” contain an item called “File Management”. There you add the definition for a new local file storage. For this basic customized setup it’s important this entry is called “primary”. Make sure to hit the “Save Changes” button on the top or bottom of the page.
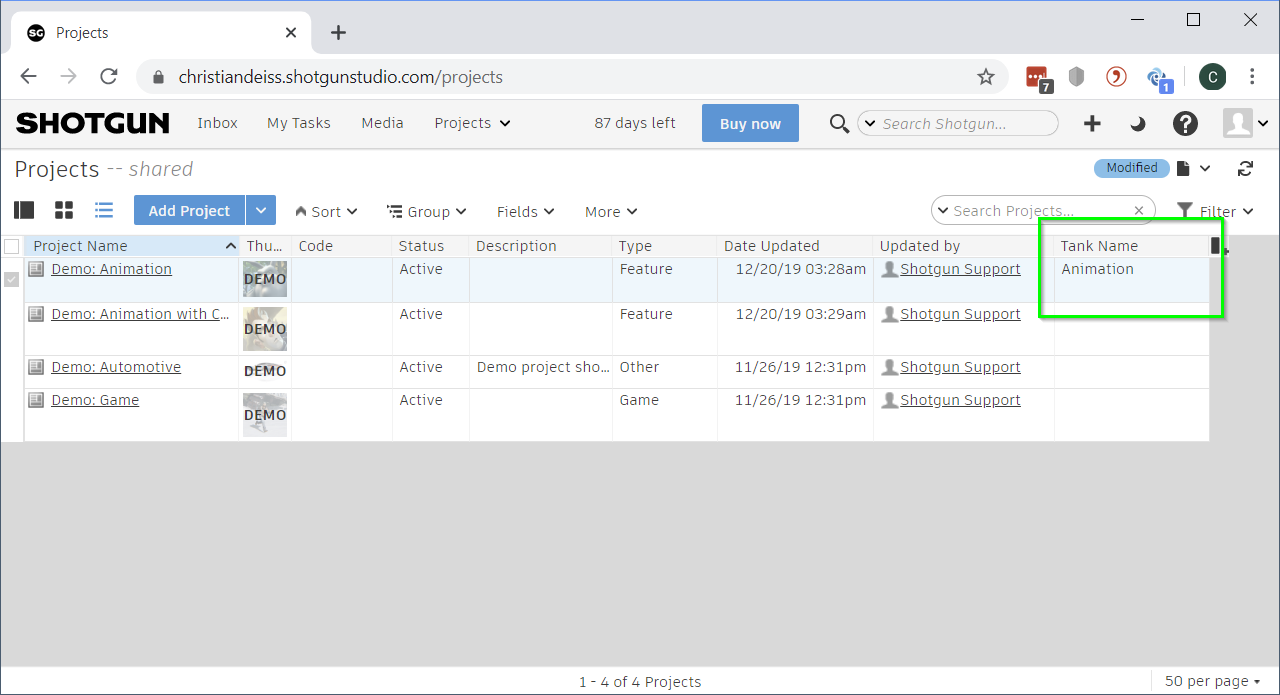
- In the last step you define the name of the folder in which all files for a project are stored. This is the field
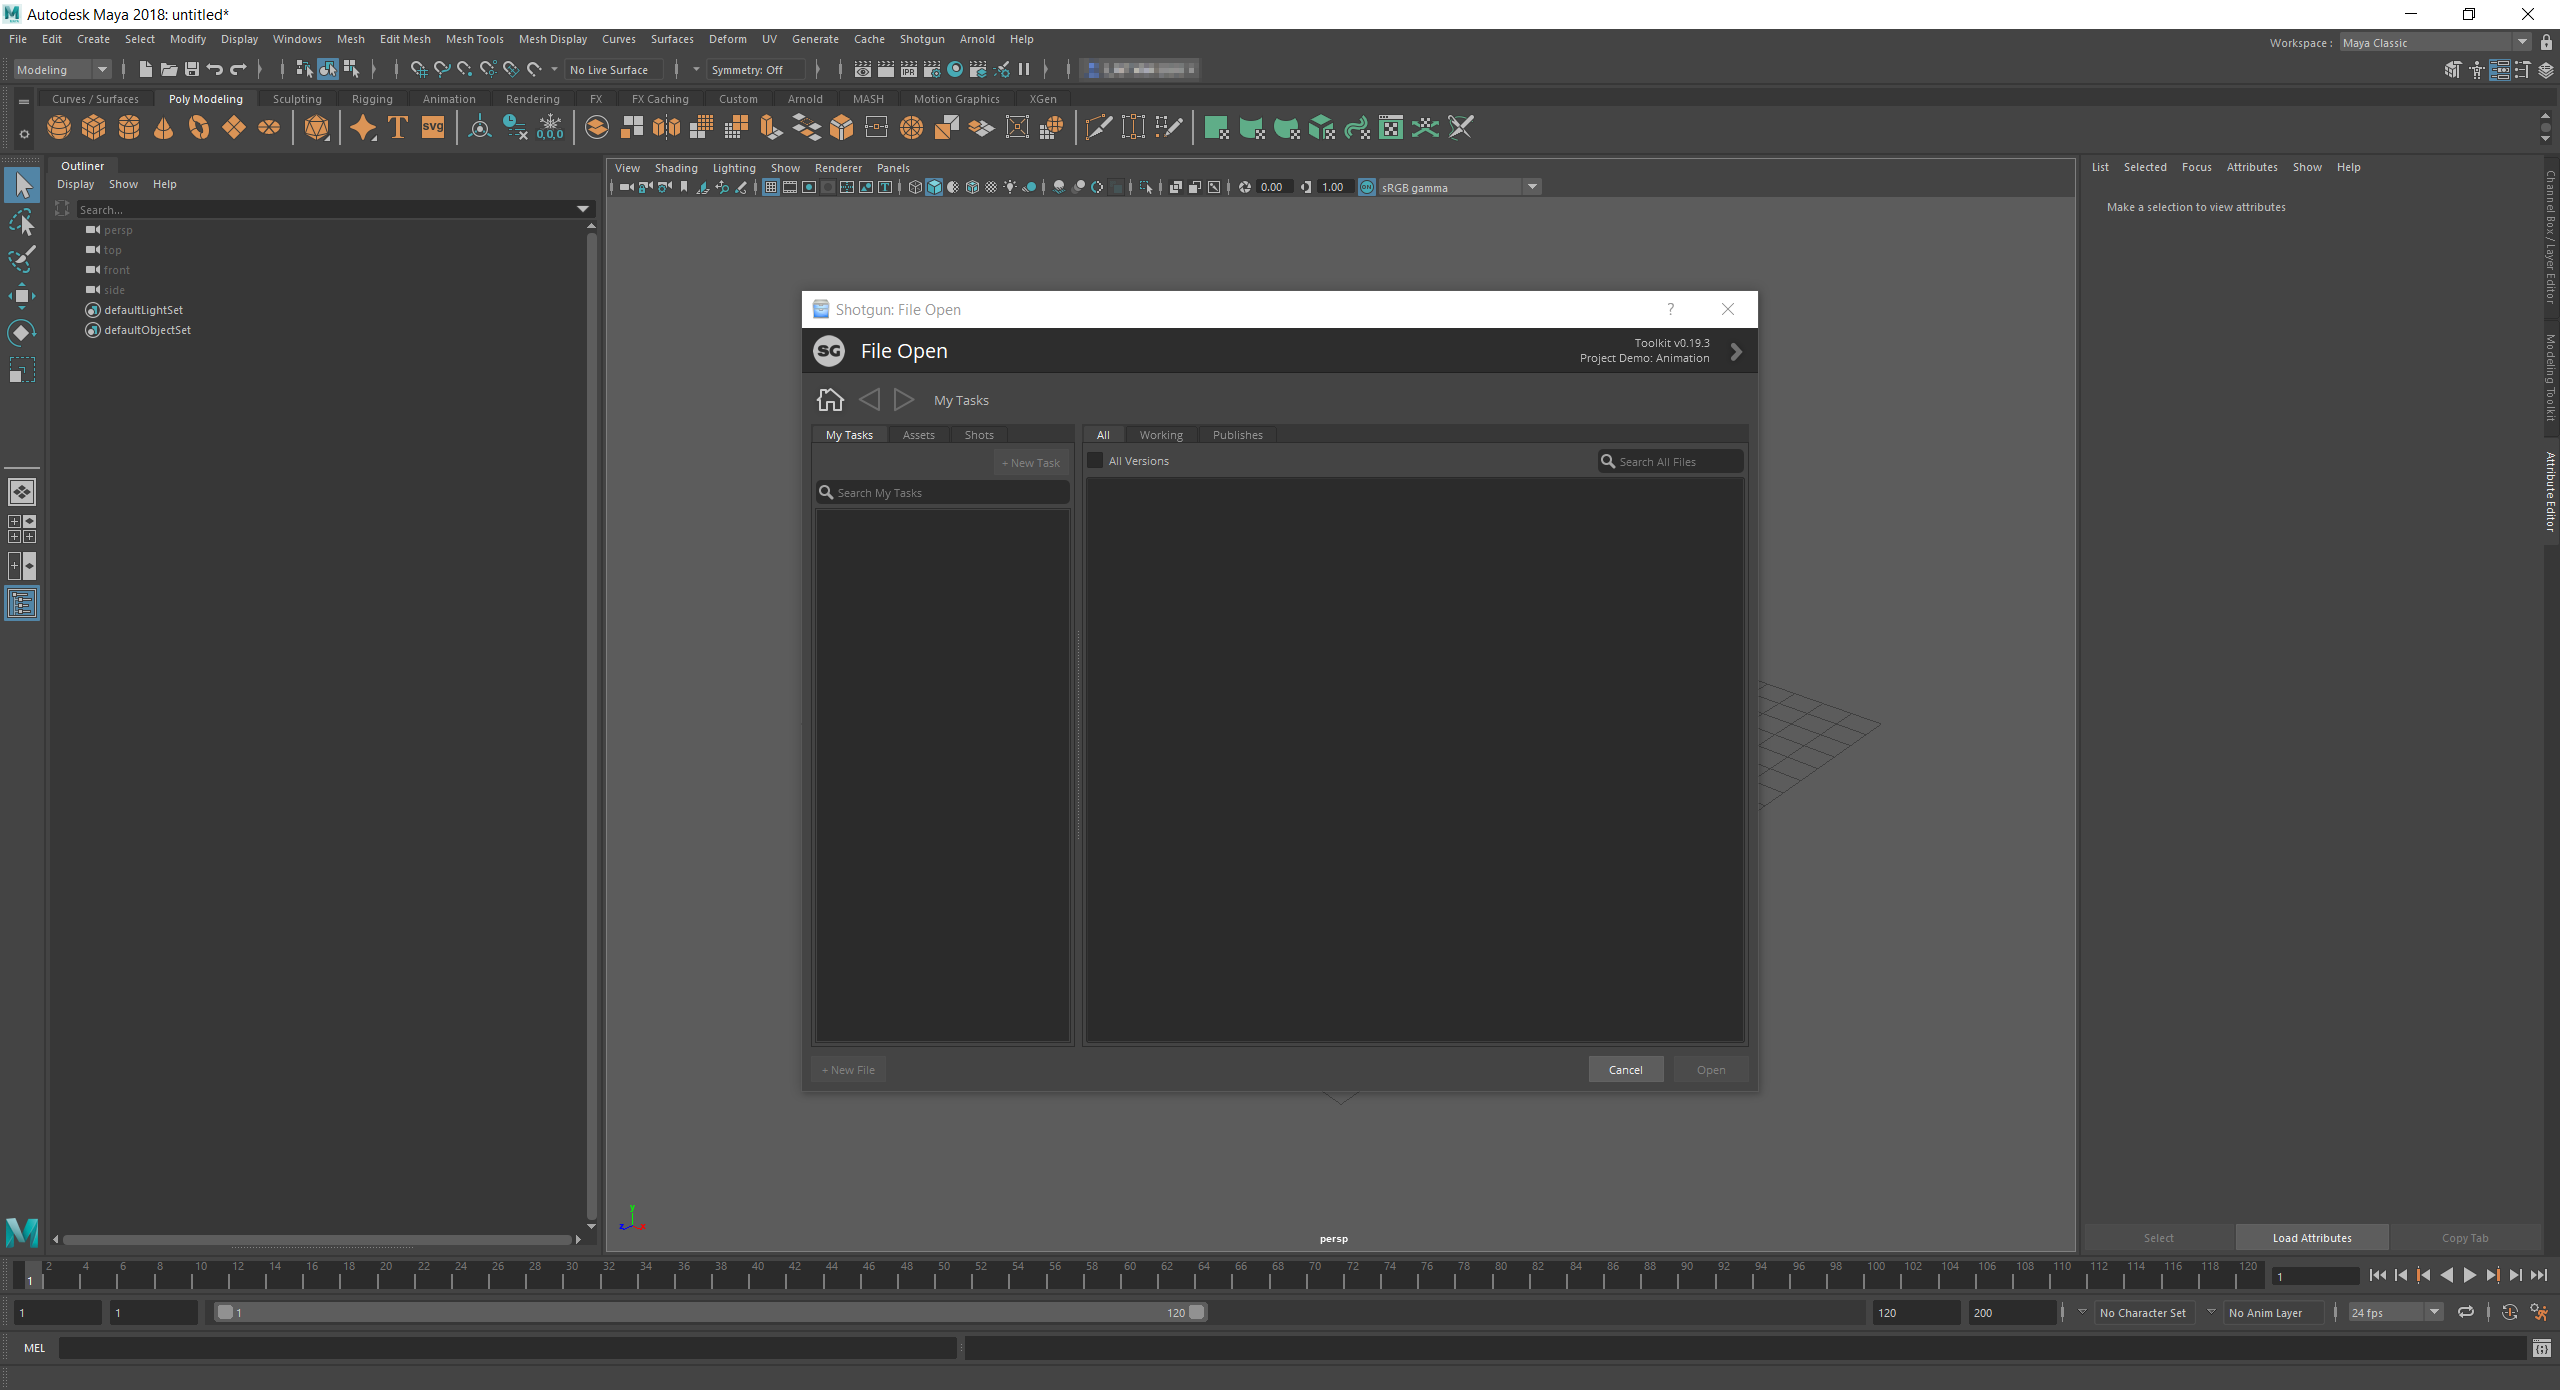
Tank Namein the project overview. - If you now launch your DCC application you have full access to your local file system. You can see this in the following screenshot of Maya which now launches with the
File Opendialog automatically loaded.

Leave a Reply